Roof Installation Process: Step-by-Step Guide for 2026
Roof Installation Process: Step-by-Step Guide for 2026
Sep 19, 2026
The Standard Roof Installation Process, Step by Step
Quick Summary:
Every roof installation follows the same basic order. Inspection, tear-off, then deck repair. Next comes underlayment, new roofing, and a complete cleanup. Knowing these steps helps you plan and spot any rushed work.
Every roof job follows the same basic order, no matter the crew. Knowing the steps helps you plan your week. We walk every homeowner through this before we ever touch a shingle. That way there's no guessing game once the trucks show up.
Inspection and free estimate. We check the deck, flashing, and ventilation. We give you an honest number before work starts.
Material delivery and staging. Shingles, underlayment, and flashing arrive a day or two before the crew.
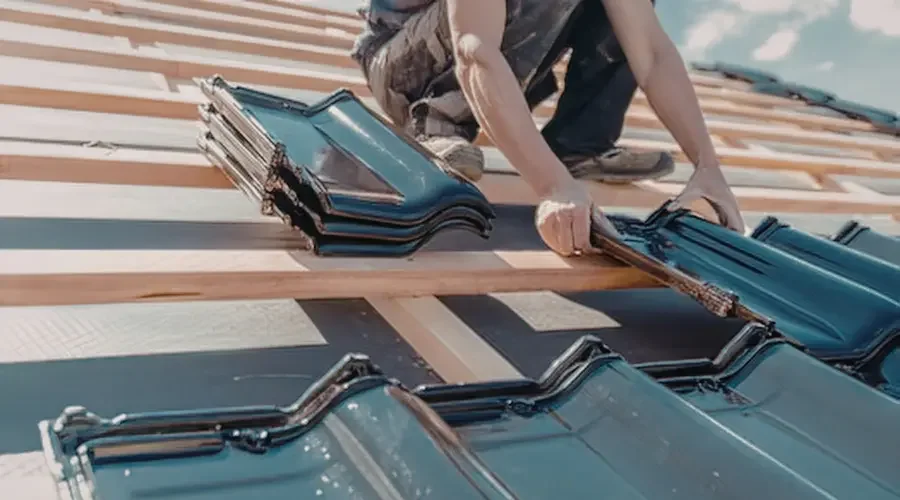
Tear-off. The old roofing comes off down to the wood deck. We haul it away as we go.
Deck inspection and repair. Soft or rotted wood gets replaced here. This step matters more near the water, where salt air speeds up wood decay.
Underlayment and flashing. This is the waterproof layer under your shingles. Flashing goes around chimneys, vents, and valleys-that's where leaks usually start.
New roofing installation. Shingles or your chosen material go on in rows. We start at the bottom edge and work up.
Cleanup and walkthrough. We magnet-sweep the yard for nails. Then we haul off debris and walk the roof with you before we call it done.
Step four often gets skipped by crews trying to save time. But we don't skip it. We've seen the cost of skipping it firsthand.
Last fall we had a homeowner near Mystic Islands. Their deck looked fine from the attic. But once we pulled the old shingles, we found soft plywood around two vent pipes. Salt air had been getting under cracked flashing for years. We caught it during tear-off, replaced the bad wood, and moved on the same day. If that had gone unnoticed, the new roof would have failed early, which, honestly, would be a real headache. This is the kind of thing a rushed crew misses. It's exactly why we do the deck check before anything new goes down.
Wind is the other piece coastal homes need to plan for. Little Egg Harbor sees strong gusts off the bay. Flashing and edge sealing aren't optional extras here. They're part of doing the job right the first time, every time.
What the 25% Rule Means for Your Roof Replacement
Here's something many homeowners in Little Egg Harbor don't know until it's time for roof work. Most building codes-and we follow them all here-use what's called the 25% rule. If more than 25% of your roof needs new material in a single job, code says you replace the whole roof section. We can't just patch it.
Why does this rule exist? It's simple. Mixing old shingles with new ones on the same slope creates weak spots. The old material has taken years of sun and salt air. New shingles next to it age at a different rate, and that mismatch can cause real leaks later.
So how does this play out on a real roof? Say a storm rips shingles off one whole side of your house. If that side makes up over a quarter of your total roof area, we can't just patch that section. Code requires us to replace that entire slope with matching material. You'd think a simple patch would be fine, but that's not how it works.
Storm or wind damage covering a large section of one roof plane
Widespread granule loss or curling shingles across a quarter of the roof
Multiple leak points that trace back to one aging roof section
Old decking underneath that's failed inspection in more than one spot
Code updates in Ocean County that apply once a certain repair threshold is hit
We see this mistake all the time. A homeowner calls for a small repair, thinks it's a quick fix, and then finds out the damaged area crosses that 25% line. That's not us trying to upsell you, it's the code talking. Any licensed roofing contractor working here has to follow it, not just our family-owned and operated crew.
This matters even more for coastal homes near Little Egg Harbor. By the way, those homes often deal with harsher conditions than anywhere else.
Salt air and wind wear down shingles faster than inland homes see. So a roof that looks fine on top can have more hidden damage underneath than you'd guess. Once you factor in a stretch of nor'easters or a rough hurricane season, that 25% threshold gets hit quicker than most people expect.
The good news? You don't have to guess where your roof stands. We offer a free roof inspection and a free estimate. You know exactly how much of your roof is affected before any work starts. No pressure, no guessing games, just an honest look at what code requires and what your roof needs.
1/2-Inch vs 3/4-Inch Plywood: Which Roof Deck Material Fits Your Home
Every roof needs a solid base under the shingles. That base is the plywood decking. Most homes use half-inch plywood. But some need three-quarter-inch instead. The difference isn't just a number on a spec sheet, it's about what your home can handle.
Half-inch plywood works fine for most standard roofs. Especially ones with rafters spaced 16 or 24 inches apart. It's the common choice. It's strong enough for shingles and nails to grip well. Three-quarter-inch decking shows up more on older homes, wider rafter spans, or roofs carrying heavier materials.
So how do you know which one your roof needs? A few things decide it.
Rafter spacing: wider gaps between rafters need thicker plywood for support
Roof age: older Little Egg Harbor homes sometimes have decking that's thinner than current building code allows
Moisture damage: soft or spongy spots often mean the old decking needs full replacement, not just a patch
Roof pitch: steep roofs put more stress on the deck, especially with coastal wind
Local wind exposure: homes closer to the bay or open water deal with stronger gusts, and a sturdier deck holds fasteners tighter
We see this a lot on older homes in Little Egg Harbor. A roof looks fine from the ground. But once we pull the shingles, the decking is thin, water-stained, or starting to sag between rafters. That's not something you catch from a ladder. It takes a hands-on inspection to really know, and we're good at that.
Here's a real example: We inspected a home near the bay where the owner just wanted new shingles. But once we opened the roof up, the half-inch decking had soft spots from years of moisture getting in around old flashing. We swapped in fresh plywood before laying a single shingle. Skipping that step would've meant a great-looking roof sitting on a weak base, and that never ends well. Honestly, it's something people often overlook.
Salt air speeds up wear on fasteners and wood fibers near the coast, so thickness alone isn't the whole story either.
Building codes in most New Jersey coastal towns call for a minimum deck thickness based on rafter span. Inspectors check this during permitted roof installation. This isn't a spot to guess or eyeball. Getting it wrong can affect how well your roof holds up in a storm. And it can cause problems if you ever sell the home.
The right thickness depends on your specific roof. It's not a one-size-fits-all answer.
This is exactly why a proper roof installation starts with a full inspection before anyone talks materials. We check the decking condition, rafter spacing, and any water damage first. Then we recommend the right plywood thickness for your home instead of assuming half-inch will always do the job. And remember, we offer a free roof inspection and a free estimate-just call (609) 389-2485.
Frequently Asked Questions
Common questions about Roof Installation Process: Step-by-Step Guide for 2026
-
You should call a professional for roof installation. Roofing involves steep heights, heavy materials, and code rules that change by area. A trained crew knows how to check the deck, seal flashing, and spot hidden damage before it becomes a bigger problem. DIY roofing often skips steps like deck inspection, which can lead to leaks later. If you want to see how a proper job runs from start to finish, check out our roof installation process guide before you decide.
-
Sometimes, but not always. Most codes use a 25% rule. If more than a quarter of one roof section needs new material, the whole section must be replaced. Mixing old and new shingles on the same slope creates weak spots that age at different rates. This mistake catches many homeowners off guard after storm damage. A free inspection can show you exactly where your roof stands before any work starts.
-
Homes near the bay face stronger wind gusts and more salt air than inland houses. This means flashing and edge sealing matter even more here. Salt air also speeds up wood decay under old shingles, so deck damage can hide even when the roof looks fine from inside your attic. Crews working in this area need to check the deck closely during tear-off, not just glance at it.
-
Tear-off removes the old roofing down to the wood deck, while a roof-over adds new shingles on top of the old layer. Tear-off lets a crew inspect and repair the deck underneath, which catches hidden rot or damage early. A roof-over skips that step, so problems can stay hidden and shorten the life of your new roof. Most coastal homes benefit more from a full tear-off because of faster wood decay near the water.
-
Most roof installations take one to three days once work begins, depending on roof size and weather. That timeline covers tear-off, deck repair, underlayment, new shingles, and cleanup. Material delivery usually happens a day or two before the crew arrives. Rain or high wind near the bay can add extra days. A clear walkthrough of each step helps you plan your week without surprises.
-
Soft or spongy spots usually mean the deck needs repair, not just a patch. This shows up more often near the water, where salt air speeds up wood decay under cracked flashing. A crew should always check the deck during tear-off, since damage often hides under the old shingles. Skipping this step is one of the most common mistakes rushed crews make, and it can cause a new roof to fail early.
Ready to Get Started?
Get a Free Estimate. Call (609) 389-2485 today.